Published by Best Fitness Routine. Editorial standards · Report a correction. Educational guidance; no individual clinical review is claimed unless a qualified reviewer is named.
Understand what the fifteen-minute routine includes
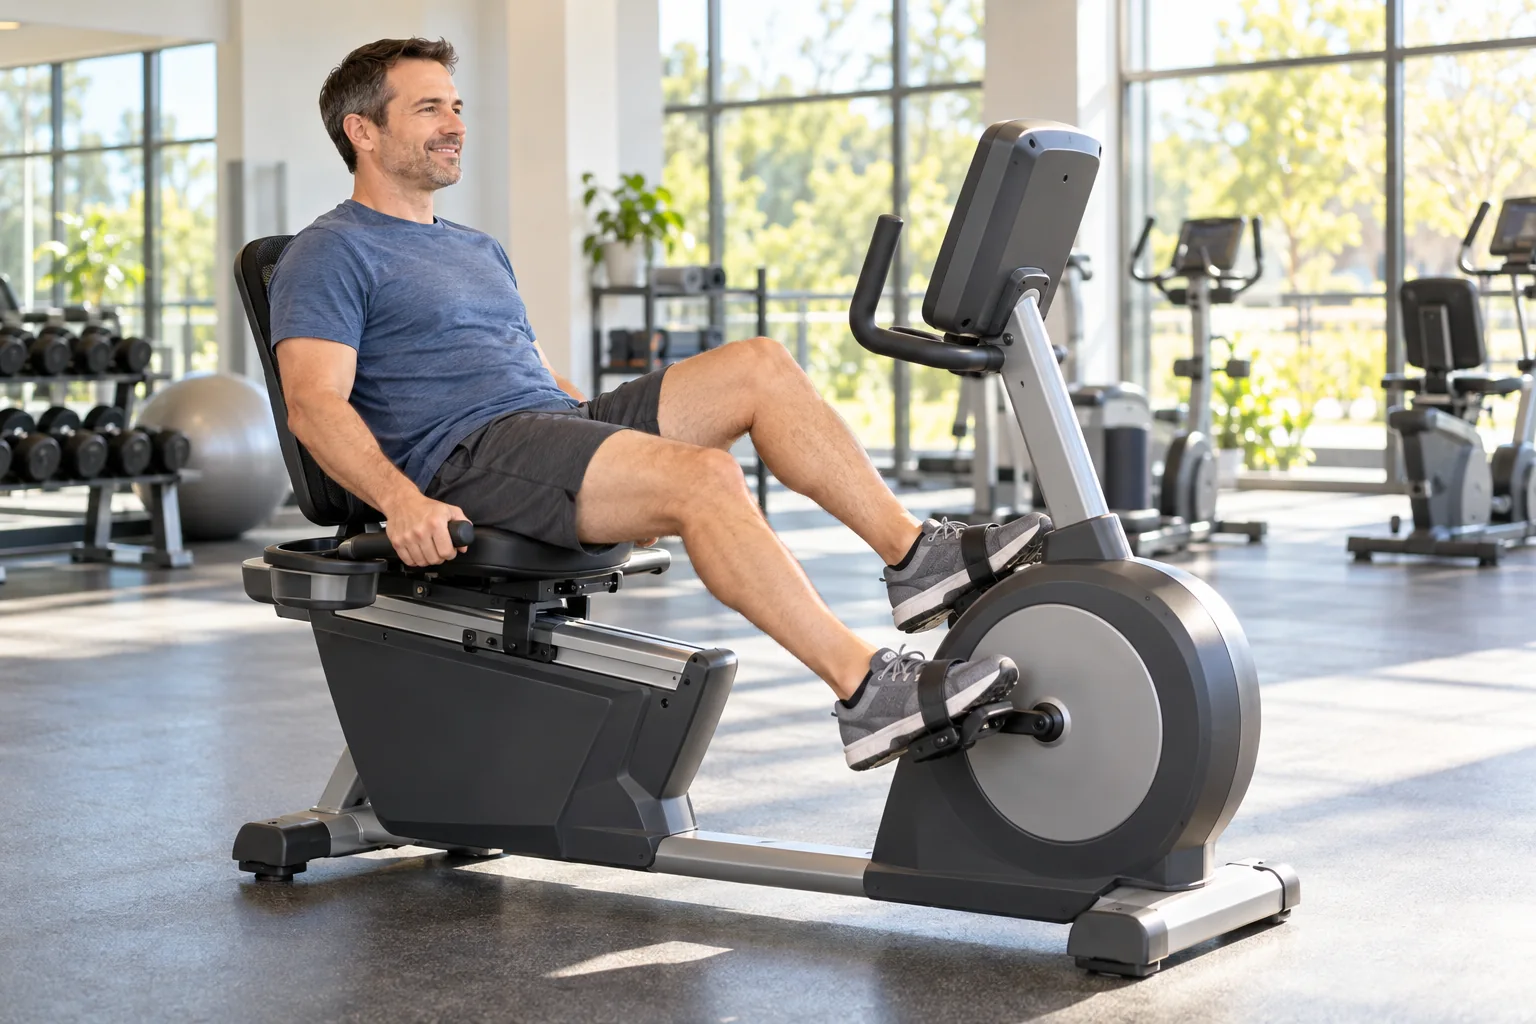
A recumbent bike workout for beginners offers a supported way to try indoor cycling, with the pedals in front and a backrest behind you. This fifteen-minute example uses four easy minutes, seven comfortable minutes and four minutes of gradually reduced effort. The structure is deliberately simple. It helps you learn seat position, smooth pedaling and stopping before introducing longer sessions. Shorten the middle section if fifteen minutes exceeds your current capacity, while keeping a gradual beginning and ending.
Back support changes the riding position, but it does not make every machine or workout suitable for everyone. Step-through access, knee movement, hip comfort and current health needs still matter. A rider with balance concerns may find the mounting arrangement helpful, while another may need individual guidance. Treat the routine as general fitness education, not a rehabilitation program or a test of medical readiness. Being seated is compatible with meaningful exercise, but harder resistance can still create substantial demand.
Check access and the actual machine
Approach the bike with enough clear space to walk around it and sit down without twisting awkwardly. Identify the seat slide, its locking system and the resistance controls before getting on. Ask gym staff for a demonstration when the controls are unfamiliar. Keep the floor free of towels and bags. The backrest should remain secure during use, and the bike should stand level rather than wobble as you transfer your weight onto it.
When comparing a recumbent exercise bike (paid link), prioritize a usable entry path, adjustment range, stable construction and a stated user-weight limit appropriate to the rider. Console entertainment cannot solve a seat that is too far away or a handle that is difficult to reach. Try a brief easy ride before committing to a home purchase when possible. Follow the maker's assembly, clearance and inspection instructions. Do not improvise a seat lock or continue using a machine with a damaged pedal strap.
Set the seat distance while stopped
Sit back comfortably with your pelvis supported and feet positioned securely on the pedals. Near the farthest part of the stroke, the knee should remain softly bent without your hips sliding forward to reach. Move the seat only while the pedals are stopped, following the bike instructions. Lock the adjustment, then test a slow turn. A setting that looks acceptable from beside the machine may still need a small change once your feet are in position.
Watch for two common extremes. Too much distance can make you point your toes or lift away from the backrest to complete the stroke. Too little distance can create an unnecessarily cramped knee or hip bend. The comfortable middle differs with body proportions and machine design. Do not use one seat number for every rider or every brand. Our bike setup guide includes the distinction between vertical saddle adjustment and a recumbent bike's seat-distance adjustment.
Start with four easy minutes
Begin pedaling at a light, controlled setting. Spend the first minute noticing the movement through both legs and whether the backrest position stays comfortable. Let your arms rest on the intended handles without pulling hard. Increase the effort gradually only if the initial setting feels smooth and manageable. Do not assume the lowest displayed resistance is correct if it leaves the pedals difficult to control; the goal is easy movement with a dependable rhythm.
The bike clock or a workout timer (paid link) can mark the transition after four minutes. Set it before starting and use a clear cue that does not require leaning forward to read small numbers. If the first minutes reveal discomfort, stop and adjust rather than entering the next block automatically. It can be helpful to repeat a short easy phase after changing the seat. Learning the setup is part of the session, even when it means the planned workout becomes shorter.
Use the middle block to learn effort
From minute four to minute eleven, maintain a comfortable continuous rhythm. Conversation should remain possible; you do not need to pedal hard enough to feel breathless. Let the setting remain steady for a few minutes before deciding whether to change it. Repeated button presses can make a beginner session confusing because you never learn what one setting feels like. Stay supported against the backrest and avoid pushing yourself forward on every stronger pedal stroke.
At roughly halfway through this block, compare breathing and leg effort. If the thighs feel heavily loaded but breathing is still easy, lowering resistance may make the session more manageable. If your feet are moving quickly without control, slowing down may be more useful than chasing speed. An optional heart-rate monitor (paid link) adds information when suitable and compatible, but generic target zones are not required. Sensor readings, medications and individual health needs can affect how useful heart-rate numbers are.
Keep the supported position active and comfortable
The backrest is a support, not a reason to slump or press the head forward toward a screen. Keep your neck comfortable and your chest free enough for normal breathing. A tablet placed too low can make you hold a bent-neck position for the whole ride. If entertainment changes your posture or hides early fatigue, start without it. Use the handles intended by the manufacturer rather than gripping a moving seat adjustment or reaching behind the machine.
Avoid bracing through a locked elbow or pulling forcefully on the handles to overcome high resistance. That changes the workout into a struggle with the machine. Reduce the setting until the legs can move smoothly while the torso stays settled. Persistent numbness, pain or unusual one-sided weakness warrants appropriate assessment rather than a thicker cushion or more determined effort. The benefit of a supported format is the opportunity to concentrate on controlled movement, not permission to ignore symptoms.
Make drinks and room temperature easy to manage
Keep a water bottle (paid link) in the intended holder or another secure reachable position. If you must twist sharply or lean away from the backrest to reach it, stop safely before drinking. The holder is a convenience rather than a prescribed fluid target. A short ride normally fits ordinary eating and drinking habits, with personal medical fluid instructions taking priority. There is no automatic need for a sports drink simply because the equipment has a calorie display.
Choose ventilation and clothing that suit the room. Indoor exercise can feel warm even during cold weather outside, and a supported chair-like seat may retain heat. In a community gym, avoid covering controls or blocking another user's walking route with a towel. Wipe the contact surfaces according to facility guidance after finishing. A sensible arrangement makes the experience repeatable across home, recreation-center and gym settings without requiring an elaborate set of accessories.
Reduce the effort over the last four minutes
During minutes eleven through fifteen, gradually make the ride easier. Keep the feet secure while the pedals move and allow breathing to settle. An easy final block should feel distinct from the middle section; simply continuing at the same hard resistance is not a gradual transition. Do not race to add distance before the timer ends. A cool-down is a practical change of demand, not a guarantee against soreness or a treatment for concerning symptoms.
Follow the stopping instructions, wait for pedal movement to finish and release the foot restraints as directed. Stand slowly, using the designated stable handles where appropriate. If you need time before walking away, take it. Dizziness, chest discomfort or severe unexpected breathlessness requires an appropriate response, not another exercise to force the symptoms away. Review our warm-up and cooldown routines when deciding how to adjust the transition for your next ride.
Track distance less and experience more
A training journal (paid link) can record seat position, elapsed time, resistance and how the ride felt. Also note whether mounting and dismounting were straightforward. These details help you recreate a useful session on the same machine. Do not compare recumbent-bike distance directly with upright-bike or outdoor cycling distance, because the systems may calculate it differently. If you change machines, begin with a fresh comfortable baseline rather than forcing the new console to match an old number.
Check later whether you can carry out normal activities comfortably. This matters more than ending the ride with a high score. A short routine that leaves manageable muscle tiredness may be repeatable, while persistent joint pain calls for review. If one part of the setup worked particularly well, record it while you remember. Clear notes can also help a trainer understand the issue if you need assistance, avoiding an unhelpful description that the entire bike simply feels wrong.
Build a repeatable next step
Repeat the fifteen-minute version until the setup and response are familiar. You might then add two minutes to the comfortable middle section while leaving the easy beginning and ending in place. Another rider may benefit from repeating the same duration more consistently before changing it. Do not increase duration, resistance and frequency together. One small change gives you a clearer way to judge whether the new workload fits your schedule and recovery.
Include other appropriate movement in the week. Recumbent cycling can contribute aerobic activity, but a complete routine may also include suitable strength work and, for older adults, balance activity. A chair-like seat does not eliminate these other needs. The cycling and strength schedule explains how to organize complementary sessions. When progression requires a position or demand that feels uncomfortable, returning to a familiar starting version is a sensible decision rather than a failed workout.
Practical Options at a Glance
| Situation | Practical option | What to consider |
|---|---|---|
| Minutes 0–4 | Easy supported pedaling | Check seat distance |
| Minutes 4–11 | Comfortable continuous effort | Avoid pushing away from the backrest |
| Minutes 11–15 | Gradually easier pedaling | Allow a calm dismount |
Frequently Asked Questions
No. The backrest supports the torso, but resistance, cadence and duration can still create a demanding workout. Access and joint comfort also vary with the particular machine and rider. Begin with controlled easy pedaling and choose effort from the response rather than the chair-like appearance.
Find a distance that allows a softly bent knee near the farthest pedal position without sliding your pelvis forward to reach. Adjust only while stopped and according to the model instructions. Persistent pain or an unclear fit needs suitable guidance rather than repeatedly moving to an extreme setting.
Daily riding is not required. Choose frequency around current activity and recovery, beginning with a manageable schedule. Observe comfort later and the next morning before adding demand. Suitable strength work and other movement can complement cycling; repeating an easy session more often is still an increase in weekly workload.
Safety and Personal Needs
Stop activity and seek appropriate help for chest pain, faintness or severe unexpected breathlessness. Persistent pain, numbness, new weakness, unexplained swelling or recurrent instability needs assessment before progression. Follow individual guidance for medical conditions, pregnancy, recent surgery or injury. The examples are adjustable general education, not clinical rehabilitation, medical clearance or guarantees against injury. Use the actual equipment manufacturer instructions; capacities, adjustments, pedals and stopping procedures differ.
This is general educational information. Individual needs vary with health, medications, fitness and training experience.